

How To Draw An Arc In Google Draw
Drawing Arcs
Your model is more than than just straight lines. SketchUp tin help you create curved geometry using arcs. Earlier you begin drawing arcs, hither are a few handy details near the way arc entities work:
- An arc contains multiple connected line segments, but exists within your model as a single entity.
- An arc can both define the edge of a face and divide a face.
- Although an arc is one entity, SketchUp'southward inference engine identifies each segment that makes upwardly an arc and highlights whatsoever geometric point if you hover your cursor over one.
- Each arc contains 12 segments by default. Withal, you can tell SketchUp how many segments to employ in an arc entity. More than segments means your arc may announced smoother, but SketchUp needs to work harder to display your model. Fewer than 12 segments keeps your model unproblematic, but the arc may look a bit blocky.
SketchUp offers four tools to aid you depict arcs in your model, each with its own unique method of creating an arc to best adjust what you want to appear in your model:
- Arc: When this tool is activated a protractor appears to help you fix the beginning and ending of the arc based on your desired angle. Your get-go click defines the centre bespeak, the 2nd your endpoint, and the third finishes the arc creating an open up arc made of straight-edge segments.
- Pie tool: This tool works only like the Arc tool, but creates a airtight pie shape that becomes a face up.
- 2 Bespeak Arc tool: Activating this tool changes your cursor to a pencil. Your first click defines one terminate of the arc, the second the other end. The third click defines the bulge of the arc.
- 3 Point Arc tool: Activating this tool besides changes the cursor to a pencil. The showtime click sets your starting indicate, the second a pin point, and the third defines the endpoint.
You can find the arc tools in a few different places:
- The Getting Started or Drawing toolbars.
- The Large Tool Gear up toolbar
- The Depict > Arcs submenu
- The Tool Palette (macOS only)
The following video introduces how you describe with the rainbow of arc tools and each tool'south golden secrets. Or read on for details about cartoon with each arc tool.
Table of Contents
- Drawing with the Arc and Pie Tools
- Cartoon with the two-Point Arc Tool
- Drawing with the 3-Signal Arc Tool
- Editing an Arc Entity
Drawing with the Arc and Pie tools
The Arc tool and the Pie tool are handy when you need to know your arc's angle, rather than a burl or radius. The Arc tool draws an open arc, and the Pie tool draws a airtight, pie-shaped arc.
To create an arc with the Arc or Pie tool, follow these steps:
- Select the Arc tool (
 ) or the Pie tool (
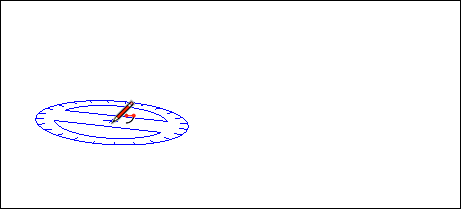
 ). The cursor changes to a pencil with an open arc or a airtight arc, respectively, and a one-half-circle protractor indicates the orientation of a drawing plane.
 - Click to place the heart of your arc. A total circle protractor appears locking the orientation of the drawing aeroplane.
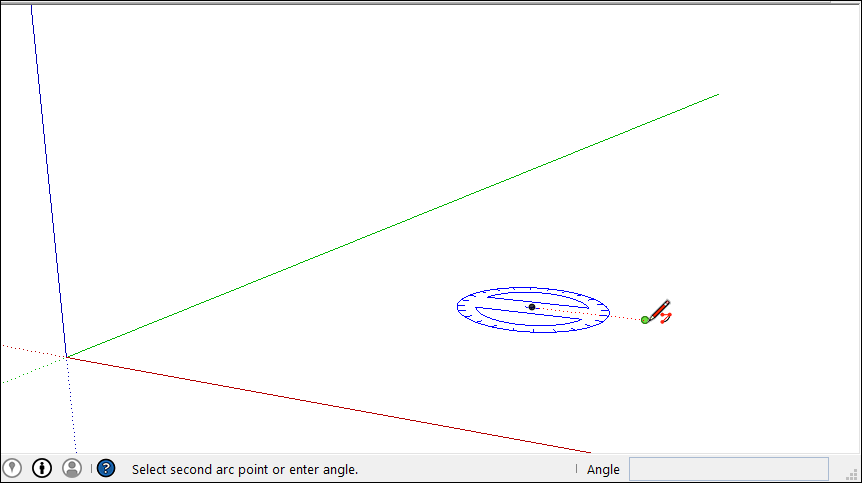
- Movement the cursor to the starting betoken of your arc. Notice that the Radius value in the Measurements box changes dynamically as you move the cursor. If you like, y'all can type a number and unit and printing Enter to prepare a precise radius value.
- Click to identify the starting point of your arc. A directly dotted line representing the radius of your arc appears, as shown in the effigy. Observe that the Measurements box changes to accept an Angle value.
- Move the cursor to the ending point of your arc.
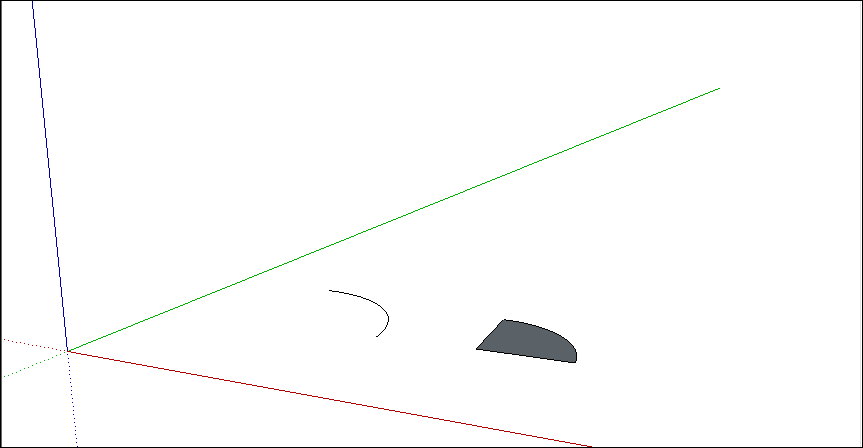
- Click to place the catastrophe point of your arc. You may also type an bending value and press Enter or Return. If y'all used the Arc tool, SketchUp creates an open arc. If you used the pie tool, you lot will see a pie-shaped face. The post-obit figure shows an open arc on the left and a pie shape on the right.
Arcs created with the Arc or Pie tool are drawn with a stock-still number of line segments past default. These segments abound or shrink in length depending on the abyss of the arc. You can modify the number of line segments or base the arc on circle segments - the number of segments it would take for the arc to form a complete circle - instead. To modify the number of segments:
- Immediately after drawing the arc, blazon the number of sides you want and the letter S for sides then printing Enter or Return.
- For example, typing 10s creates an arc with 10 line segments.
- To increase the number of segments press Ctrl + (Microsoft Windows) or Option + (macOS).
- To decrease the number of segments press Ctrl - (Microsoft Windows) or Option - (macOS). Please notation, if y'all're using a French Canadian keyboard, press the Ctrl key (Microsoft Windows) and the +/= key to increase the segments. For macOS, press Control and = to increase segments or - to decrease segments.
To base your arc on circle segments:
- Immediately after cartoon the arc, type the number of circle sides and the letter C for circle and then press Enter or Render.
- For example, typing 20c tells SketchUp to base your arc on a 20-sided circle.
Drawing with the ii Bespeak Arc tool
When y'all draw an arc with the 2 Point Arc tool, you gear up the starting point, the ending betoken, and the bulge altitude. The distance between the starting indicate and the ending point is also known equally the chord length.
To depict a 2-bespeak arc, follow these steps:
- Select the 2 Point Arc tool (
 ). The cursor changes to a pencil with an arc.
 - Click to identify the starting betoken of your arc. The Measurements box is now ready to accept a Length value.
- Motility the cursor to the catastrophe point of your chord. (Press the Esc key at any betoken during the operation to showtime over.)
- Click to identify the ending bespeak or blazon a length value and press Enter. A straight line is created. The Measurements box changes to have a Bulge value.
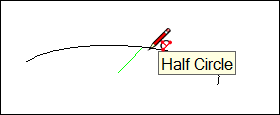
- Move your cursor perpendicular to the straight line to adjust the bulge distance. If you lot want to draw a one-half circle, sentinel for the half-circle inference, as shown in the figure. The inference tells you when the arc is a half-circumvolve. You can tap the arrow cardinal to lock your motility to that inference; Upwards for Blueish, Left for Green, Correct for Ruby. You'll see a notification at the cursor that the inference is locked.
- Click to set the burl distance or type a value, such equally 5' or 7mm, and printing Enter or Return.
Annotation: If y'all need to echo the aforementioned 2-point arc in your model - for example if you're rounding all 4 corners on a rectangle - you tin merely motility your cursor to each corner and double-click. This activity repeats the previous arc parameters and fifty-fifty cleans out the excess waste.
Tip: Immediately after you depict a 2-bespeak arc, you tin can change the burl, radius, or number of segments with the Measurements box. Think that yous don't need to click in the Measurements box first; simply type a value and press Enter or Return. Hither'southward how to alter each value:
- Burl altitude: After yous cease creating a 2-point arc, the Measurements box is ready to accept a Burl value past default. Simply type the value and units (if different from the default units in your template).
- Radius: You can specify an arc radius instead of a bulge distance. Type the desired radius in the Measurements box and add the letter R for radius. For example: 24r or 3'6"r or 5mr
- Number of segments: Type a number and followed by the letter S for segments. For case: 20s
Drawing with the 3 Bespeak Arc tool
When you lot use the iii Point Arc tool, you describe the arc based on a pin bespeak. Follow these steps to use the 3 Indicate Arc tool:
- Select the 3 Point Arc tool (
 ). The cursor changes to a pencil with an arc.
 - Click to establish a starting point of the arc.
- Motion the cursor away from the starting point.
- Click again to constitute the second point. A small dot appears, which is a pivot point for the arc.
- Movement the cursor away from the dot. An arc appears as you move the cursor. You tin can tap the pointer key to lock your movement to that inference; Up for Blue, Left for Green, Correct for Crimson. You'll see a notification at the cursor that the inference is locked.
- When you similar the shape of your arc, click to finish creating the arc.
Note: Press the ESC key at any bespeak during the operation to start over.
Tangent Inferences for 2-Point and 3-Indicate Arc Tools
You can create a tangent arc using either the 2-Point or three-Indicate arc tools using inferences. Hover over an edge you want to use every bit a tangent basis before clicking to begin your arc. To lock your tangent inference, printing the Alt key (Microsoft Windows) or the Command key (macOS).
Editing an arc entity
Yous tin edit the radius of an arc entity using the Move tool or in the Entity Info dialog box.
With the Move tool ( ) selected, y'all can edit an arc entity every bit follows:
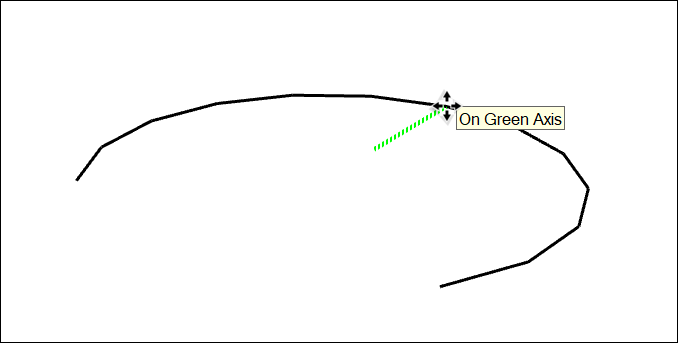
- Adjust the midpoint: Hover the Move tool's cursor to locate the midpoint of the arc. Then click and drag to adjust the arc, equally shown in the figure.
- Motility an end betoken: Click and elevate an arc'south endpoint to arrange the arc's length and radius.
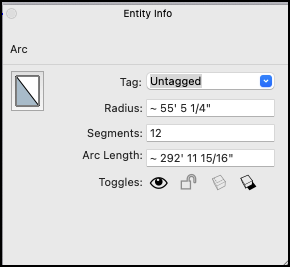
To access your arc'south Entity Info panel, context-click the arc you desire to edit. From the context bill of fare choose Entity Info. In the Entity Info panel blazon a new value for the radius or number of segments.
Warning: If an Arc is transformed in a way that destroys its radial definition, such as with a non-compatible scale operation, you can no longer edit the entity as an arc. At that bespeak, the arc behaves like a freehand shape.
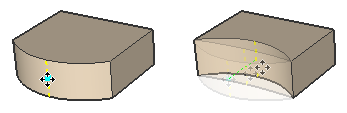
When you use the Push/Pull tool to extrude a second face that includes an arc, SketchUp extrudes a special surface entity whose radius can besides be edited. Utilise the Motion tool to reposition the midpoint edge, and all the geometry that makes up the extruded arc will move accordingly, every bit shown in the figure.

Source: https://help.sketchup.com/en/sketchup/drawing-arcs
Posted by: ramosessan1979.blogspot.com
0 Response to "How To Draw An Arc In Google Draw"
Post a Comment